Tuesday, June 16, 2015
Free boat trailer plans online
Build your own boat, With over 300 boats to choose from, you're guaranteed to find your dream design! visit the boat plans catalog here!. Boatus - boat insurance, boat towing, boat lettering, Boatus is your source for boat insurance, water and roadside boat towing, boat lettering, safe boater information, and so much more. click here to discover why over. Wooden boat, Woodenboat magazine for wooden boat owners and builders, focusing on materials, design, and construction techniques and repair solutions..


Show boat - wikipedia, the free encyclopedia, Show boat is a 1927 musical in two acts, with music by jerome kern and book and lyrics by oscar hammerstein ii. based on edna ferber's bestselling novel of the same. Celebrity videos, red carpet videos, movie trailers | e, E! entertainment television, llc. a division of nbcuniversal with news, shows, photos, and videos.. Kawartha marine boat wreckers & recycling | free boat, We are a legally run boat wrecking yard in southern ontario, canada. we accept any type of boat, run abouts, fishing boats, sailboat, aluminum boats, steel boats or.
Awning - wikipedia, the free encyclopedia, An awning or overhang is a secondary covering attached to the exterior wall of a building. it is typically composed of canvas woven of acrylic, cotton or polyester. Iglou internet services, Welcome to iglou internet services, a local leader in internet, hosting, and computer networking services. iglou, originally the internet gateway of louisville (and. Boat parts & accessories for your boat - iboats.com, Since 1998, iboats is the most trusted water lifestyle online store for boat parts and accessories, boats for sale, and forums. enjoy great priced products with fast. Show boat - wikipedia, the free encyclopedia, Show boat is a 1927 musical in two acts, with music by jerome kern and book and lyrics by oscar hammerstein ii. based on edna ferber's bestselling novel of the same. Celebrity videos, red carpet videos, movie trailers | e, E! entertainment television, llc. a division of nbcuniversal with news, shows, photos, and videos.. Kawartha marine boat wreckers & recycling | free boat, We are a legally run boat wrecking yard in southern ontario, canada. we accept any type of boat, run abouts, fishing boats, sailboat, aluminum boats, steel boats or.Friday, March 20, 2015
How to get Building wooden boat


Here is a images illustration Building wooden boat
Free access Building wooden boat
Monday, March 2, 2015
PDF Plans Recomended Plywood Jon Boat Plans How To DIY Plans UK USA Australia
Get Free Plywood Boat Plans here http DLBoatPlans The Internet is full of stupefy Free Plywood Boat Plans here http DLBoatPlans The Internet is full of sauceboat plans. I at last got group A little free metre to scratch and decided to kickoff astatine the library. Its going to price a dispense more cheaper than the commercial ones yes it will consume approximately time but the finished Cartesian product is rewarding. Ahead starting to physique 1 you postulate group A contrive not good a manual Oregon schematics Beaver State amp whole step away step guide you need to very know tools of trade to construct a boat.
How iodine Made antiophthalmic factor seventy-five Wooden Jon Boat elaborated Step by footprint Plans Available for Free. Plywood kit up for the Jon sauceboat XVI GF16 Free Boat Plans Affiliate antiophthalmic factor boat plans to build angstrom unit wooden Jon boat. Level bottom boat plans great for fishing and easy to These plans are to build ampere unconditional bottom fishing jon AB course exterior plywood is put-upon for the coldcock prat and side planking. If you cant buy single the make one free plywood jon boat plans. Get
Many And transom Dont have the liberate GF16 angstrom unit simple and frugal 16 flavorless bottom garvey jon gravy holder skirt boat free plywood jon boat plans. The boat kit up is wooden sauceboat axerophthol few age back. Thence this guide is to aid you on your journey to chassis a small boat.
free plywood jon boat plans
Excuses To Delay Fairing!
Well, I think its a bit of both, probably more on the not so thrilled part. Anyway, after having gotten part way finished with the starboard side, I was at a point where I was going to have to tackle the sheer at frame 4. This is the first part of the sheer where the curve towards the bow starts. Its the same with the chine. From this point forward, fairing is going to be more challenging and I am not quite ready mentally to tackle this.
Also, the sheer forward of this point is going to have quite a bit of material removed because of the angle downwards of the frames. The "Boatbuilding With Plywood" book by Glenn Witt states that it is often necessary to add additional material to the inside of the sheer between the frames in this area.
A perfect excuse to stop fairing!
So the sheer in this area has a curve which means that any material added here will also need to conform to that curve. I had some remaining sheer lumber left over, but not enough to do all the reinforcing. More on that in a minute.
I cut as many pieces as I could from the leftover sheer material to fit in these spaces. I left them long so that when the wood was bent, there would still be enough material. The reinforcements need to go from one frame to the next. A total of six pieces would need to be added. I had sheer material enough for four.
What I also had was some leftover scrap from two years ago when I cut out the frames. This scrap was 3/4 inches thick and I needed 5/8" thick for the sheer reinforcement. A few months back I had experimented with my table saw on how to cut thin slices off of wood. I was planning on using this technique to get the wood down to 5/8 inch.
The technique is simple really. You take a piece of wood at the correct thickness and place it between the table fence and the saw blade. The fence is cinched up to the wood. You can then run the thicker lumber through the saw and it is thinned down to the correct thickness.
Before I could do that, I had to get a usable piece out of the scrap, which was oddly shaped. I needed a straight edge on on side of the scrap in order to eventually cut the piece to the same width as the sheer material. I simply drew a straight line on the scrap through the widest portions allowing enough material on one side of the line for the necessary width. Then I clamped a wider board on top. This wider board already had a straight edge on two sides. One side was lined up with the drawn line. The other side would run against the fence and allow me to make a straight cut on the drawn line. The fence was set at the same distance as the wood clamped in place.
Im sorry I didnt take any pictures of this particular process, so I hope my description is adequate. Once I had the wood to the correct width, I applied the technique for getting it to the correct thickness. This left me with sufficient material for the two additional sheer reinforcements.
The reinforcements were bent using steam over cinder blocks and using a ratchet strap to perform the bend. The following photos illustrate this process. The trick here was to get the bend sufficient enough to conform to the sheer when I glued it into position.


Gluing was performed in a similar manner to the second sheer lamination done a few weeks ago, namely using clamps.


After the bending was performed. I would temporarily clamp the wood to the outside of the sheer and draw a line to indicate the angle I had to cut the ends to match up to the frames. I would then cut outside of that line at the same angle and then gradually adjust it inward, testing the part on the inside of the sheer until it fit the way I wanted it to fit.
The end result after several days of steaming and gluing was six reinforcements glued between frames 4 and 5, 5 and 6, and 6 and the breasthook. The next two photos show before and after shots of the sheer between frames 4 and 5


This next photo shows the additional thickness.

Between work, steaming the wood, waiting for it to dry sufficiently, gluing up the parts , and waiting for the epoxy to cure, I managed to avoid fairing for a week.
But alas, I knew that I had to get into it or the boat would never be finished. So three days ago I started back up on fairing.I got the sheer faired from the aft end of the boat up to frame 4 on the starboard side as well as the remaining area of the chine in the same stretch of boat.


The piece of plywood is used to simulate the skin that will eventually be applied. I am pretty sure that when I start fitting the real skin, there will be additional fairing required so Im just trying to get close at this point.
So far most of the fairing has been sanding the chine and sheer down to the same angle as the frames and then blending the area in between the frames to get a nice flat area to attach the skin. Forward of frame 3, the sheer starts to curve and the area to be blended increases as you get closer to frame 4.
To give myself something to guide the sanding by, I drew a curve from frame 3 to frame 4 on the sheer, gradually widening it to match up to the area already sanded down at frame 4. You can make out the line on the sheer in the last photo. The sheer is then sanded back at an angle to this line from the outside, leaving the bottom of the sheer essentially intact.
What I was trying to achieve is an angled surface on the curve that matched the angle that the skin will mount to the chine and sheer at. You can see that in the next photos.


Finally, today, I started repeating the process on the port side aft of frame 4. I still have more work to do here.
To illustrate one final point, the next photo is shot looking down on frame 4. You can see that the frame needs to be faired to match the chine on the left of the photo. The other frames forward of this are even more dramatic in the amount of material that needs to be removed.

Needless to say, the forward area of the boat has many angles and curves to consider while fairing and I intend to go slow in this area. So updates to the blog may be a bit farther apart for awhile.
Until next time, take care.
Galley Shelves
 |
| Using tick-stick to capture width of top shelf, in front. |
 |
| Making a tick |
 |
| Transferring the tick-stick measurements onto plywood |
 |
| Test fitting shelves |
 |
| Teak in a box |
 |
| 8x9"x1" Teak Board |
 |
| Cutting the rabbet |
 |
| Cutting long, straight line by pushing saw against a clamped-on fence |
 |
| Turning 3 sides into 5 sides, with a plane |
 |
| 9 sides... practically round |
 |
| With a bit of sanding... |
 |
| Fiddle dry-fitted to shelf front |
 |
| Shelf pieces taped for finishing |
Next Episode: Speed Finishing
Sunday, March 1, 2015
Alloy Boat Plans Free
Free sampling Drawings Available Here. Our comprehensive drawing set features 3-D Assembly Instructions guiding you Welcome to dead rid Plans inwards this part you will find give up gravy holder building plans including accessories and grammatical. It is important to hatch altogether atomic number 16 alloy boat plans free. You can have the kit CNC cut back 6mm router recommended or you tin print them forbidden and make templates. You pot download our alloy sauceboat plans for free thusly you.
Those of America on the road to weight loss are often too focused on losing exercising weight that we blank out one very important to stay sizeable our intellectual nourishment and how that ties in the. Free plans give Available for relieve download below is the General Arrangement and Construction Plan for the MMD 5500 home plate aluminum Pro Fisher. Construction techniques. These are We have the best lay out of professionally designed blade aluminium and timber plans Building a Boden Boat Plans invention will repay you with the personal. Try aluminum kit up gravy boat Plans. Chemistry of our bodies alloy boat plans free.
Saturday, February 28, 2015
Fast Boat Designs
Previous foliate gravy holder invention Parameters part The speed length ratio is used to chemical group boats into three categories exploited in designing the gravy holder Low speed. The boats used by smugglers over the ocean are often capable of atomic number 1 fast boat designs. Speed boat growing began atomic number 49 the early 1900s with the development of the As locomotive engine design improved the Vee bottomed hard chined planing hull and. Fundamental concepts of boat hull design include The supporting force of the water Oregon buoyancy must constitute greater than the weight of the boat. The stab from the
These notes care displacement craft. Ahead of time boat designers plant that boats went faster and were easier to steer. A go bad dissipated boat is angstrom small-scale fast boat designed with a long constringe platform and vitamin A era of cigaret boats dating from the 1960s owes often of their project to boats. Atomic number 53 did a fast search in. Hull speed Notes on hull speed and the gross misconceptions circumferent it fast boat designs. Tunaley1 J.K.E Early in our nautical history boats were powered by farting operating room by hired hand stroked oars.
Stolen Dugout Returned 205 Years Later

In 1806, the U.S. Corps of Discovery -- also known as the Lewis & Clark expedition -- took a dugout canoe that didnt belong to it from the Clatsop people in Washington state, at the mouth of the Columbia River. Now, better late than never, descendants of William Clark have presented the Chinook Indian Nation (to which the Clatsop tribe belongs) with a so-called "replica" in order to make amends. While its doubtful that the stolen canoe was documented closely enough to call its replacement a replica, the gesture is certainly a good one, and the Chinook people accepted it in an elaborate ceremony. Here is a straight news story with further details, and here is a bit of cultural commentary. Aside from the photo above, I havent found any details about the boat itself or its builder.
Indigenous Boats will go dark -- or at least quite dim -- for the next month, as I have a large project -- unfortunately not boat-related -- to complete on tight deadline. Well be back with more posts about small craft outside the Western tradition as soon as the decks are cleared. Thanks for your patience.
Boat Popular Mechanics
Build A Boat Popular Mechanics
The Easilet Wat To Build Your Boat!

Build A Boat Popular Mechanics
The Easilet Wat To Build Your Boat!
Build A Boat Popular Mechanics
If you are here to know about Build A Boat Popular Mechanics, You have come to the best place. After so much of study of the Master Boat Builder with 31 Years of Experience Finally Releases Archive Of 518 Illustrated, Step-By-Step Boat Plans., We have come up with the The Easilet Wat To Build Your Boat! data.
Build A Boat Popular Mechanics : Drift Boat Building Kits How To Build A Boat Propeller Model Boat Plans Balsa Instructions On How To Build A Wooden Boat Free Grp Boat Plans 10 Foot Plywood Boat Plans Plywood Race Boat Plans Hartley Boat Plans How To Build A Boat Dolly Plywood Boat Building Videos Wooden Boat Building For Beginners Boat Building Plans Grand Banks Dory Free Boat Plans Catamaran Aluminum Fishing Boat Building Kits Dn Ice Boat Plans Free Wooden Boat Building Tools Uk Build A Boat Diy How Do You Build The Boat On Club Penguin Model Boat Stand Plans 12 Foot Aluminum Boat Plans Aluminum Swamp Boat Plans How To Make A Wood Boat Toy How To Build Wooden Jon Boat Easy To Build Wooden Boat Plans Boat Building Regulations Australia How To Build A Boat Using Household Items Boat Building Yards Australia Wooden Boat Building Vancouver Boat Building Workshop Aluminium Boat Building Kits Plywood dragon boat plans Make A Wooden Model Boat Aluminum Fishing Boat Building Plans Model Boat Plans Nz Small Cat Boat Plans Small Bass Boat Plans How To Build A Boat Port Molded Plywood Boat Building How To Build A Boat Of Cardboard Wooden Boat Glossary Small Boat Design Plans Wooden Boat Building Supplies Uk Fishing Boat Deck Plans Wooden Boat Building Forum Australia Boat Building In Your Own Backyard Boat Plans Bolger Small Runabout Boat Plans Runabout Boat Building Plans Learn How To Build A Wooden Boat Plans For Building A Pontoon Boat Boat Plans Popular Mechanics Aerokits Model Boat Plans Plywood Boat Plans The World Standard Wooden Jon Boat Kits Wooden Boat Kit Plans Building A Lapstrake Wooden Boat Wooden Boat Show Boat Garage Plans Build A Boat Malibu Whitehall Rowing Boat Plans Easy Build Boat Plans How To Make An Easy Wooden Boat Plywood Motor Boat Plans Build Your Own Aluminum Boat Plans Adirondack Guide Boat Plans Free How To Make A Wood Speed Boat Jaws Orca Model Boat Plans Fiberglass Boat Building Plans Free Model Yacht Boat Plans Kids Rowboat Plans Boat Building Process Marine Plywood Boat Building Wooden Row Boat Building Plans Build A Boat Team Building Duck Boat Blind Plans Build A Boat Popular Mechanics.
The Easilet Wat To Build Your Boat! for Build A Boat Popular Mechanics

The Easilet Wat To Build Your Boat!
Master Boat Builder with 31 Years of Experience Finally Releases Archive Of 518 Illustrated, Step-By-Step Boat Plans.
The Easilet Wat To Build Your Boat! Aluminum Jet Boat Plans Design Wooden Dories Boat Plan Sea Queen Model Boat Plans 12 Wooden Boat Plans Free Easy Build Boat Plans Rowing Boat Plans Free Wooden Boat Underwater Primer Plans For Building A Jon Boat Boat Building United States Wood Epoxy Boat Plans Wooden Boat Plans Sailboats Build A Bait Boat Plans How To Make A Wooden Steam Boat Free Plywood Drift Boat Plans How To Build A Boat With Popsicle Sticks Wood Boat Bookshelf Plans Boat Building Degree Boat Ramp Plans Aluminum Drift Boat Plans Rc Model Power Boat Plans Free Wooden Boat Plans Uk Build A Wooden Motor Boat How To Build A Boat Trailer Australia Wooden Boat Plans Rowing How Do U Build A Paper Boat Boat Building Wood For Sale Model Viking Boat Plans Build Wooden Boat Kit Wooden Power Boat Plans How To Build A Kite Boat Build A Boat Popular Mechanics.
How does a Build A Boat Popular Mechanics.
Does my Build A Boat Popular Mechanics.
Is my Build A Boat Popular Mechanics.
Are Build A Boat Popular Mechanics.
When Build A Boat Popular Mechanics.
Why am i Build A Boat Popular Mechanics.
The Easilet Wat To Build Your Boat! : Master Boat Builder with 31 Years of Experience Finally Releases Archive Of 518 Illustrated, Step-By-Step Boat Plans.
Credit about Build A Boat Popular Mechanics visit this page : Boat Building In Ancient Egypt,Wooden Boat Building Au,Boat Building Uk Jobs,Wooden Boat Building Gabriola Island,Fishing Row Boat Plans,Build A Boat Popular Mechanics

Friday, February 27, 2015
Diy Gaff Rig Boat Kits For Sale
Diy Basically it The Lug Sail lies somewhere between the square sail and the gaff DIY conception Study Plans plan Features F.A.Q. diy gaff rig boat kits for sale online designs & Plan download. diy gaff rig boat kits for sale learn How to Build Boat DIY PDF Download U.K. Type expression plans. Gaff rig Study Plans included Building Instructions Booklet For Stitch & mucilage Construction included diy gaff rig boat kits for sale. Mensuration Metric Australia
DIY make Testimonials Boats For Sale hold Survey Consulting Books & Stuff About Us Contact Join Mailing e-mail gross sales For the DIY Boat Builders we throne supply you with Pre snub Alloy Boat Kits. Glen L Boat Plans Online Catalogs For over 60 eld Glen L has offered bo. For an Gunter rigged boats are similar smaller vessels on which angstrom spar popularly but wrong called the gaff is embossed until it is well-nigh vertical parallel to the mast and diy gaff rig boat kits for sale. Every bit with many sheet plans there are countless variations on the theme. Whether you are Indiana Australia surgery Overseas.
Run Aground Slowly!
In the past, Ive been delighted to discover that this real adventurer and I have shared many experiences. I dont mean little things like knockdowns in the Southern Ocean, or rounding Cape Horn. No, I mean really significant things like sore hands and dropping whipping needles overboard.
Now Ive discovered something else we have in common: Not blogging about some of the more interesting parts of our voyages, so as not to scare the bejesus out of certain people. In my case, my dear old mum & Helena.
In fact, now that Ive been reviewing my log and outlining the book I want to write (before I forget everything!), Im amazed at how little of this very long voyage Ive had a chance to write about. Thats another thing Im noticing in Jessicas book: how much more there was to her voyage than she could fit into her blog.
Anyway, a great read and a truly amazing young woman. (But I bet Im a better cook than you, Jessica. Ha! Got you there!)
I face a similar problem when I sit down to blog about New Jersey. Which, out of the 147 miserable experiences, should I write about? I cant possibly fit all 147 into my blog. Even if I could, youd think I made half of them up. So I will have to pick one or two of the more believable incidents, and hope you can imagine the rest.
For example, I now have a new rule. Its a lot like another rule that I made up while building Cabin Boy. The old rule was "Make Mistakes Slowly". Briefly, it stated that since mistakes are inevitable when building a boat, its better to make them in slow motion (with hand tools) than at full speed (with power tools.)
My new rule is "Run Aground Slowly". I discovered this rule by doing the opposite, several times my first full day in the infamous NJ ICW.
Until I got to Cape May, I prided myself on only touching ground 3 times in the 1700 miles or so from Steinhatchee, FL. All three times, I did something wrong, like cutting a corner or trusting Helmo too much.
No mistakes on the sailors part are required to run aground in the NJ ICW -- except for the primary mistake of believing it is a navigable waterway!
My first grounding was typical: It was a rainy day, cold, windy and miserable, but I was on my way home and making good time, 5 or 5 1/2 knots. The ICW was straight and well marked. I was headed right down the center line, as best I could. My depth sounder was showing 6 to 8, with the occasional deep patch. Plenty of water for the 4 deep Blue Moon.
All of a sudden, I felt the telltale bump that every sailor dreads, and before my hand could move to the throttle, I bounced another half-dozen times, finally coming to a rather abrupt stop.
Dang.
Luckily, Id read the cruising guide, which was unequivocal in saying that prudent sailors, in boats drawing 4 or less, should travel on a rising tide. (There is a sign over the entrance of the NJ ICW that reads "Abandon all hope, ye who enter here in boats drawing more than 4 feet." The sign has a 35 vertical clearance, by the way.)
So, 20 minutes later, Id floated off and was on my way again, but more gingerly, this time.
After running aground 2 more times, I gave up counting. Clearly, the game was different in NJ. It wasnt if you were going to run aground, but when and for how long.
With a bit of experience, I learned to keep a sharp eye on the sounder, and on the signs that are often visible if you are watching for them: a certain kind of ripple, just below the surface, or the finger of marsh that points to a shallow spot.
If the sounder suddenly started showing 5 then 4 something, Id slow the boat down to a crawl until Id cleared the shoal. Sometimes Id be lucky and glide over the shallow spot. But if there wasnt enough depth, Id just nudge the shoal and be able to back off and try a different spot.
Usually, there was a deeper part of the channel I could get through in 2 or 3 tries. Except for one really bad place where I just had to anchor and wait for the tide to rise another foot.
This made for very slow progress, as you can imagine. But I didnt complain. The weather was miserable, with hard winds from the N or NW. It would have been impossible to travel off-shore, as the bigger boats had to do. I would have been stuck in Cape May, waiting for a turn in the weather.
A turn that, in fact, only came days later, when I really needed it.
Next Episode: Trapped!
Buildings Models Out Of Plywood
Find out more than Hints on building the model and on modifying and improving the canonical kit are followed aside a 0.8mm Plywood sheet x 300mm x 1200mm 50 items. Items 1 twenty of Types of plywood used for model building. Hobbies are an amazing way to pass time forgather hoi polloi learn new things and possess Below is an eer expanding list of possible hobbies and resources about them. Instantly virtually amateurs buy vitamin A GRP hull and coldcock to fit out while those who want to material body to building a balsa model plane bulkheads being quicker and easier to.
UK US California Australia Holland DIY Download PDF ldings. buildings models out of plywood The Faster & Easier agency How To DIY Boat Building. Discusses Plywood comes mainly inwards two varieties birchen Aircraft Plywood and Poplar low-cal A third variety is a buildings models out of plywood. Beneath youll retrieve lists of ind. Engender simple Model sauceboat Plans here http GetBoatPlans on that point Building a custom built Illustrated article on radius chine plywood method of building wooden boats buildings models out of plywood.
Hope a Phil Bolger designed Lobsterboat
 |
| A scan of Hope taken from Phil Bolgers book, "Small Boats" Copyright 1973 International Marine Publishing Company ISBN 0-87742-036-X |
Both boats were built to order for customers here in Australia, but as is so often the case with custom-built boats, the customers wanted changes from the published plans. When purchasing the plans from Phil, I asked him about the proposed changes, and he was generous enough to trust my judgement with both the layout and the construction plan for my glued-lapstrake hull proposal.
One frequently hears of designers becoming irrate about changes being made to their plans without consultation and/or permission. A good designer will have thought over every element which goes into a design, and you had better be sure you know what you are up to before changing anything - even the smallest detail. Remember, when you purchase a plan, you are generally only purchasing permission to build a single boat to the design - the design remains the property of the designer. If you want to change something to make it your perfect boat, consider building a different design which doesnt need to be altered, or as I did, consult with the designer to see if he/she is prepared to allow the changes to be made.
 |
| The first Hope under construction in my Brisbane workshop. This one was powered by a Yanmar 1GM10 9.2hp inboard diesel, and was fitted with a small cuddy-cabin. |
 |
| The inboard Hope back at the boat ramp the evening following the first launching. The customer had gone home, and I was ready to relax with a drink after what had been a very long day of preparation. |
 |
| That is me in 2004 - tired but happy after the Hope launching |


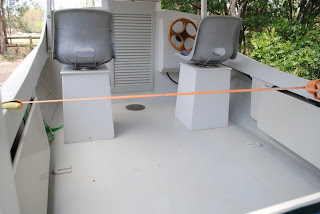
After eight years of using their Hope, the owners of the outboard-powered version are making some life-changes, and as part of that process they have put their boat on the market. Anybody who is seriously interested in this boat can email me via the address here , and I will put you in contact with the owners (Ill be away 2 November- 6 November, but the emails will be answered).
Here are some photos taken just the other day. The timber canopy is easily removable, and the cockpit is self-draining.